Landing Gear
The landing gear starts with laminating 4 layers of ¼” thick boards together to form a V. I used vertical grain Douglas fir, and T-88 epoxy. I had to invest in a planer to get the boards all the same thickness. I wish I had purchased the planer sooner. I would have been handy when cutting fuselage sticks.
Landing gear ‘V’s. Made up of 4 x ¼” laminations. Blocks of wood are bolted to the workbench to provide clamping pressure. The top lamination on one of my Vs split. I’m not absolutely certain what cause this, but I suspect I applied too much clamping pressure. The wood blocks tend to arc when pulled down from the ends, and I suspect the top lamination may have arched enough to split. It’s only a theory. I didn’t discover the split until much later, but it was not too difficult to plane it off and add another lamination in its place. Only the top lamination was split.
Final Gear “V”. Looks really good.
Summer 2015
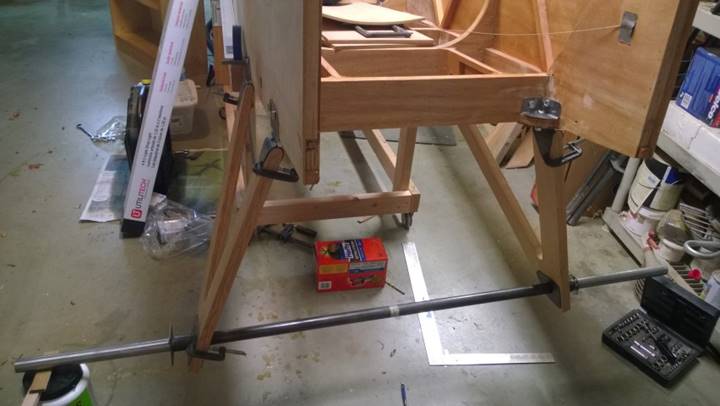
Progress was slow over most of 2015. The landing gear
has been a huge road block. The Flybaby plans
don’t quite provide all the angles for the various steel plates that are welded
or bolted to the axle. It’s kind of weld-to-fit affair. Since I’m
not a welder, I needed professional help.
I cut and trial fit everything, made jigs to hold things in place, then
took it to the pro for welding. Getting all the fittings the way I wanted
them was a pain. Most fittings were
remade at least twice. I have a box full
of scrap 4130 steel to prove it. I
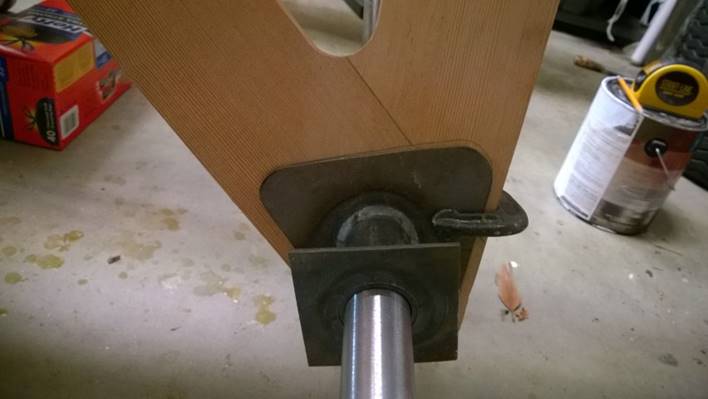
purchased a 1.5” axle and welded brake fittings from Andrew Budek-Schmeisser,
but then after talking with the folks at Matco Manufacturing
I decided to switch to a 1.25” axle. Since
my landing gear Vs were already drilled for a 1.5” axle, I had to remake them
too.
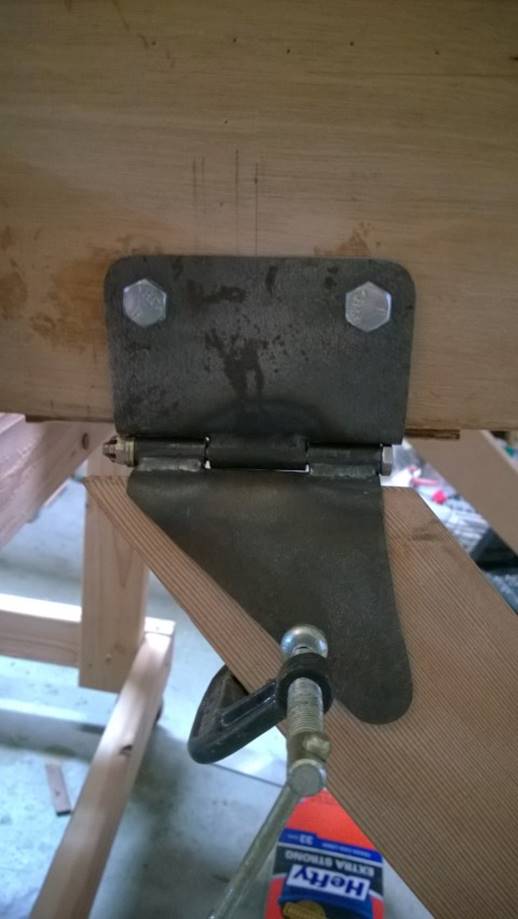
Drilling the holes through the fuselage and metal fittings
was challenging. I had to plug and re-drill most of the holes a second
time. Make sure your fittings are very tightly clamped in place
before drilling, and use a good quality drill bit.
February 2016
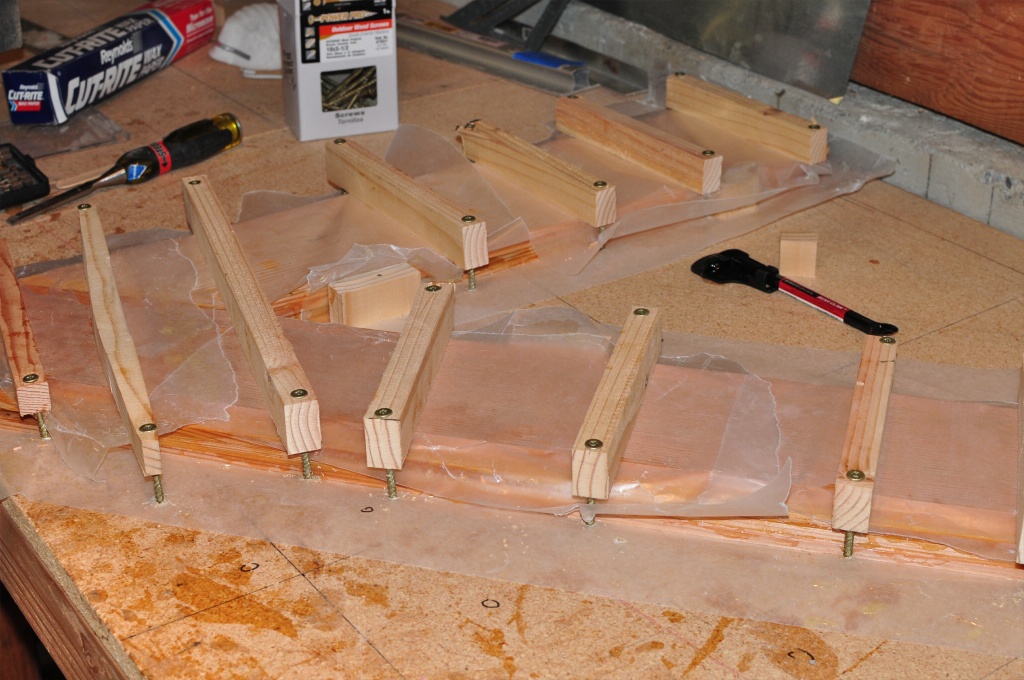
I’ve had some difficulty obtaining a tailwheel leaf spring suitable for my flybaby. Tony Bingelis (Sportplane Construction Techniques, page 256) suggests buying automotive leaf spring and bending it cold, but I’d heard that this doesn’t hold up well over time. While searching the web, I came across an article on krbuilder.org about a fellow who built one out of fiberglass. I was inspired to give it a try. It turned out OK, but I haven’t really tested it yet. I suspect I will need to remake it a bit thicker. Anyway, here’s what I did.
I needed a frame (mold?) on which to build up the tailwheel. I had some left over scrap 2” thick blue insulation foam, so I used that. I put two blocks back to back and cut them to shape on the band saw. Packaging tape over the top helps hold the two blocks together and prevents the resin from sticking to the foam.
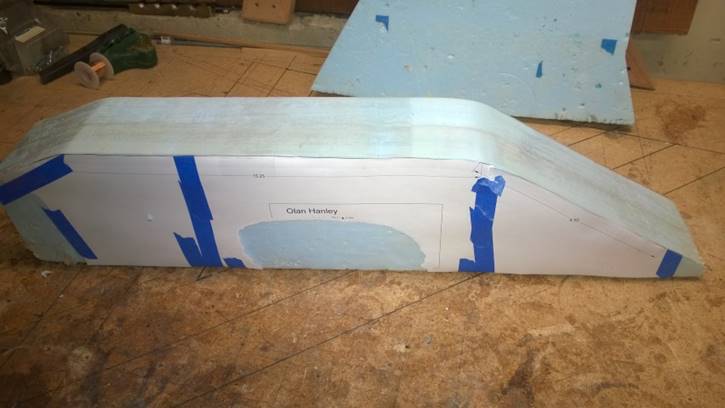
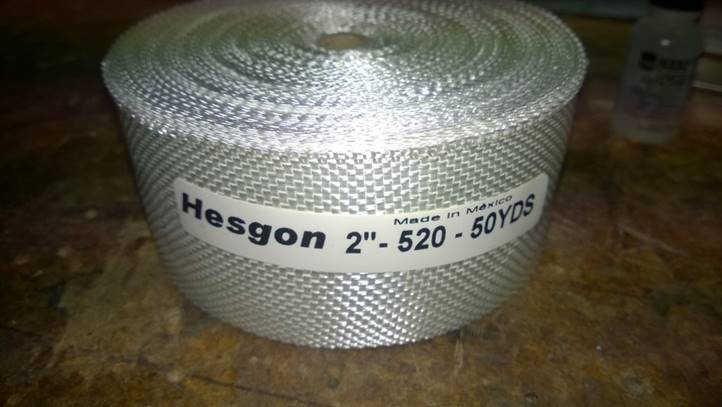
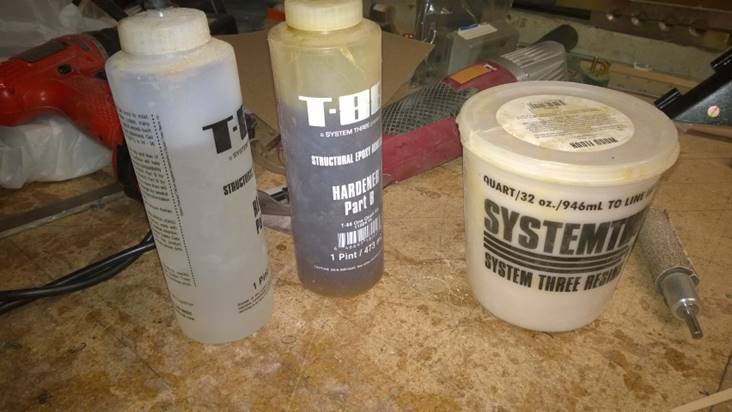
My local TAP plastics provided all the materials. I decided to use Vinyl Ester Resin, because it’s less expensive than epoxy and I’m considering building a fuel tank out of it, so I wanted to run some tests on it. Unfortunately, it’s pretty nasty stuff. The fumes are horrible, nothing like epoxy. If I make another one, I’ll use epoxy. I used 2” fiberglass tape instead of cloth. Tape costs more than clothe, but it has a selvage edge that keeps the threads from pulling out. Very convenient for a project like this.
The following photo shows all the materials used.
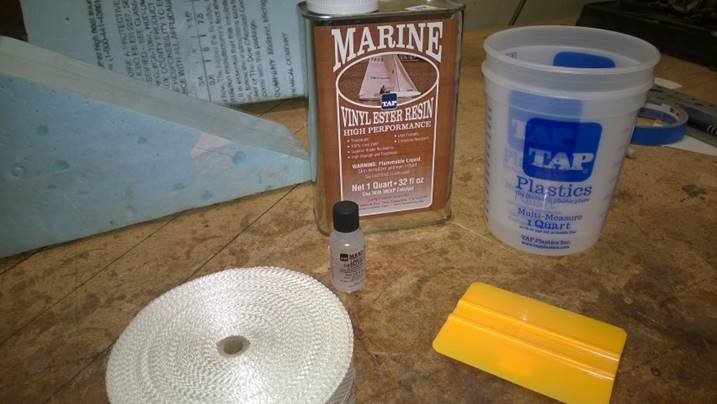
Foam mold, Vinyl Ester Resin, MEK hardener, fiberglass tape, plastic squeegee, and mixing cup.
I didn’t keep track of the number of strips I used. I kept layering it on until it was about 3/8” thick. Probably 25-30 layers. I put a few extra short pieces over the final bend. Most folks put a backup spring here when using metal, I figured with fiberglass I might as well just make it thicker in this area.
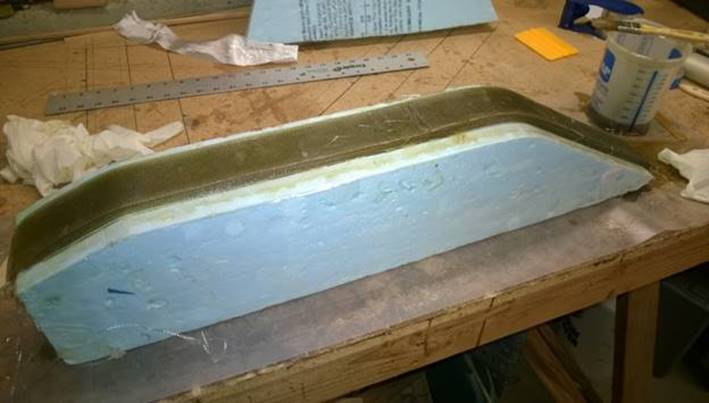
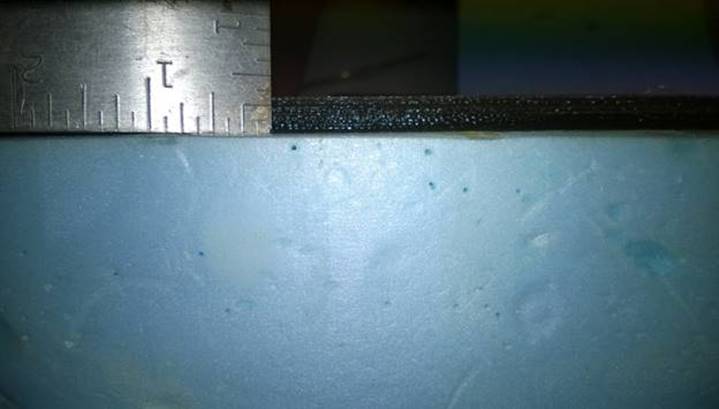
I used the cut-off portion of the foam to press down evenly on the foam and squish out a bit more resin. This was very effective, but resulted in a spring that was thinner than I hoped. As shown in the following photo, it’s less than 5/16”. I’ll probably need something a little thicker. If I re-do it, I’ll use more layers.
The spring easily came free from the packaging tape, but the Vinyl resin leached through the tape and dissolved the blue foam, so the bottom surface was not completely smooth. It’s OK, but If I do it again, I’ll use a more solid surface underneath. I put wax paper on the top of the spring while compressing it. The wax paper stuck, and had to be sanded off. I would use plastic next time.
Summer 2016
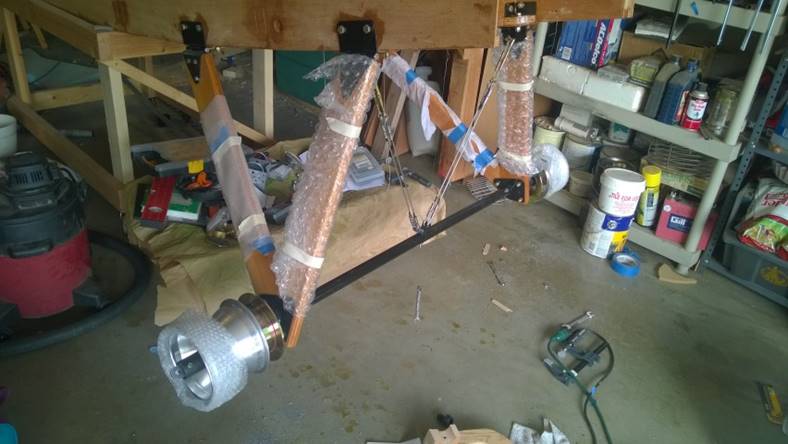
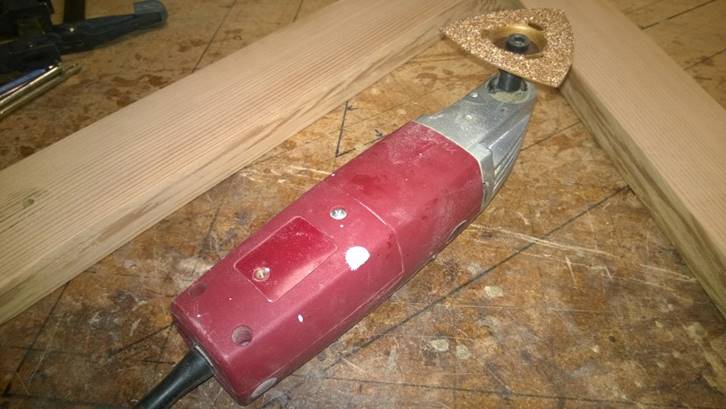
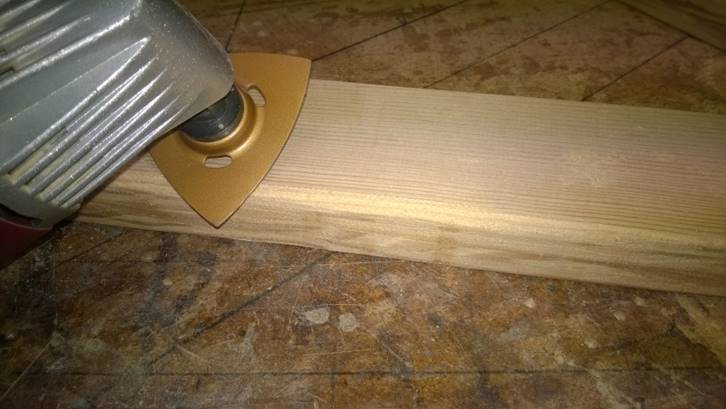
It was finally time to shape and varnish my landing gear Vs. I made good use of an inexpensive Harbor Freight oscillating tool with a triangle rasp head to roughly round off and shape the Vs; followed by a lot of sanding.
The plans call for rounding off the top of the landing gear Vs to tightly match your metal fittings. This is kind of tricky, so I cheated and built a paste of epoxy and wood filler to tightly fill the gap.
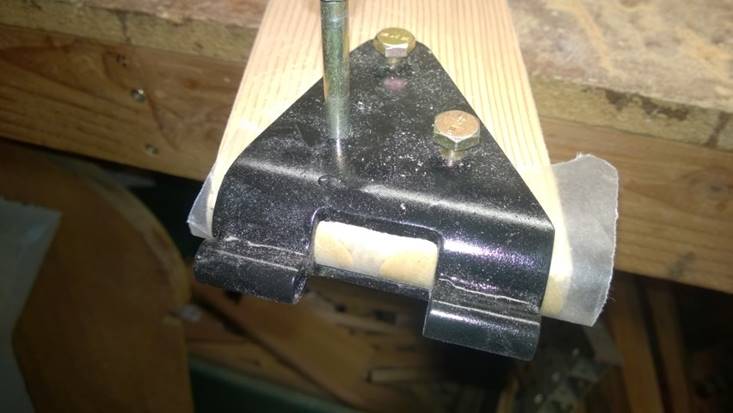
The following photo shows a crude wood jig I created to help keep holes I drilled centered and perpendicular to the Axle.

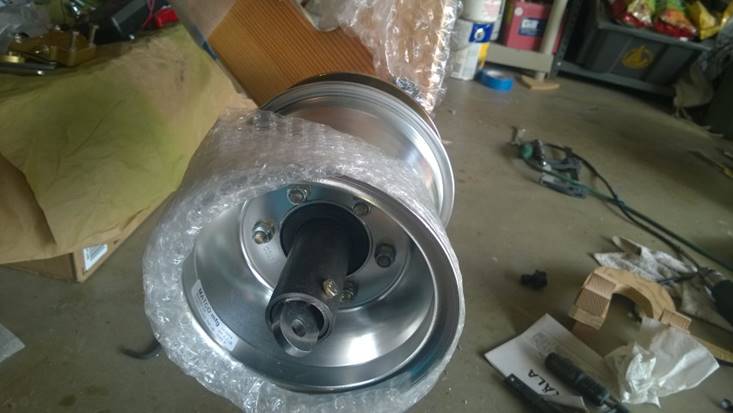
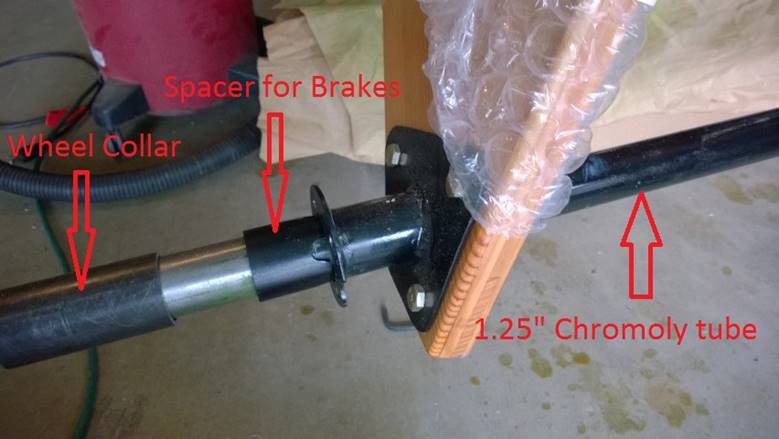
I decided to go with Matco MHMHE6B1.25 wheels and brakes, as recommended by Matco. The wheels have a rather small footprint on the Axle. I could have cut the axles a bit shorter, then the collar could be smaller, but I was concerned about effect on the flying wires. The angle from the anchor to the wings would be flattened ever so slightly, which would increase the load a bit. Also, keeping the axle long will give me the option of changing to other wheels if necessary.